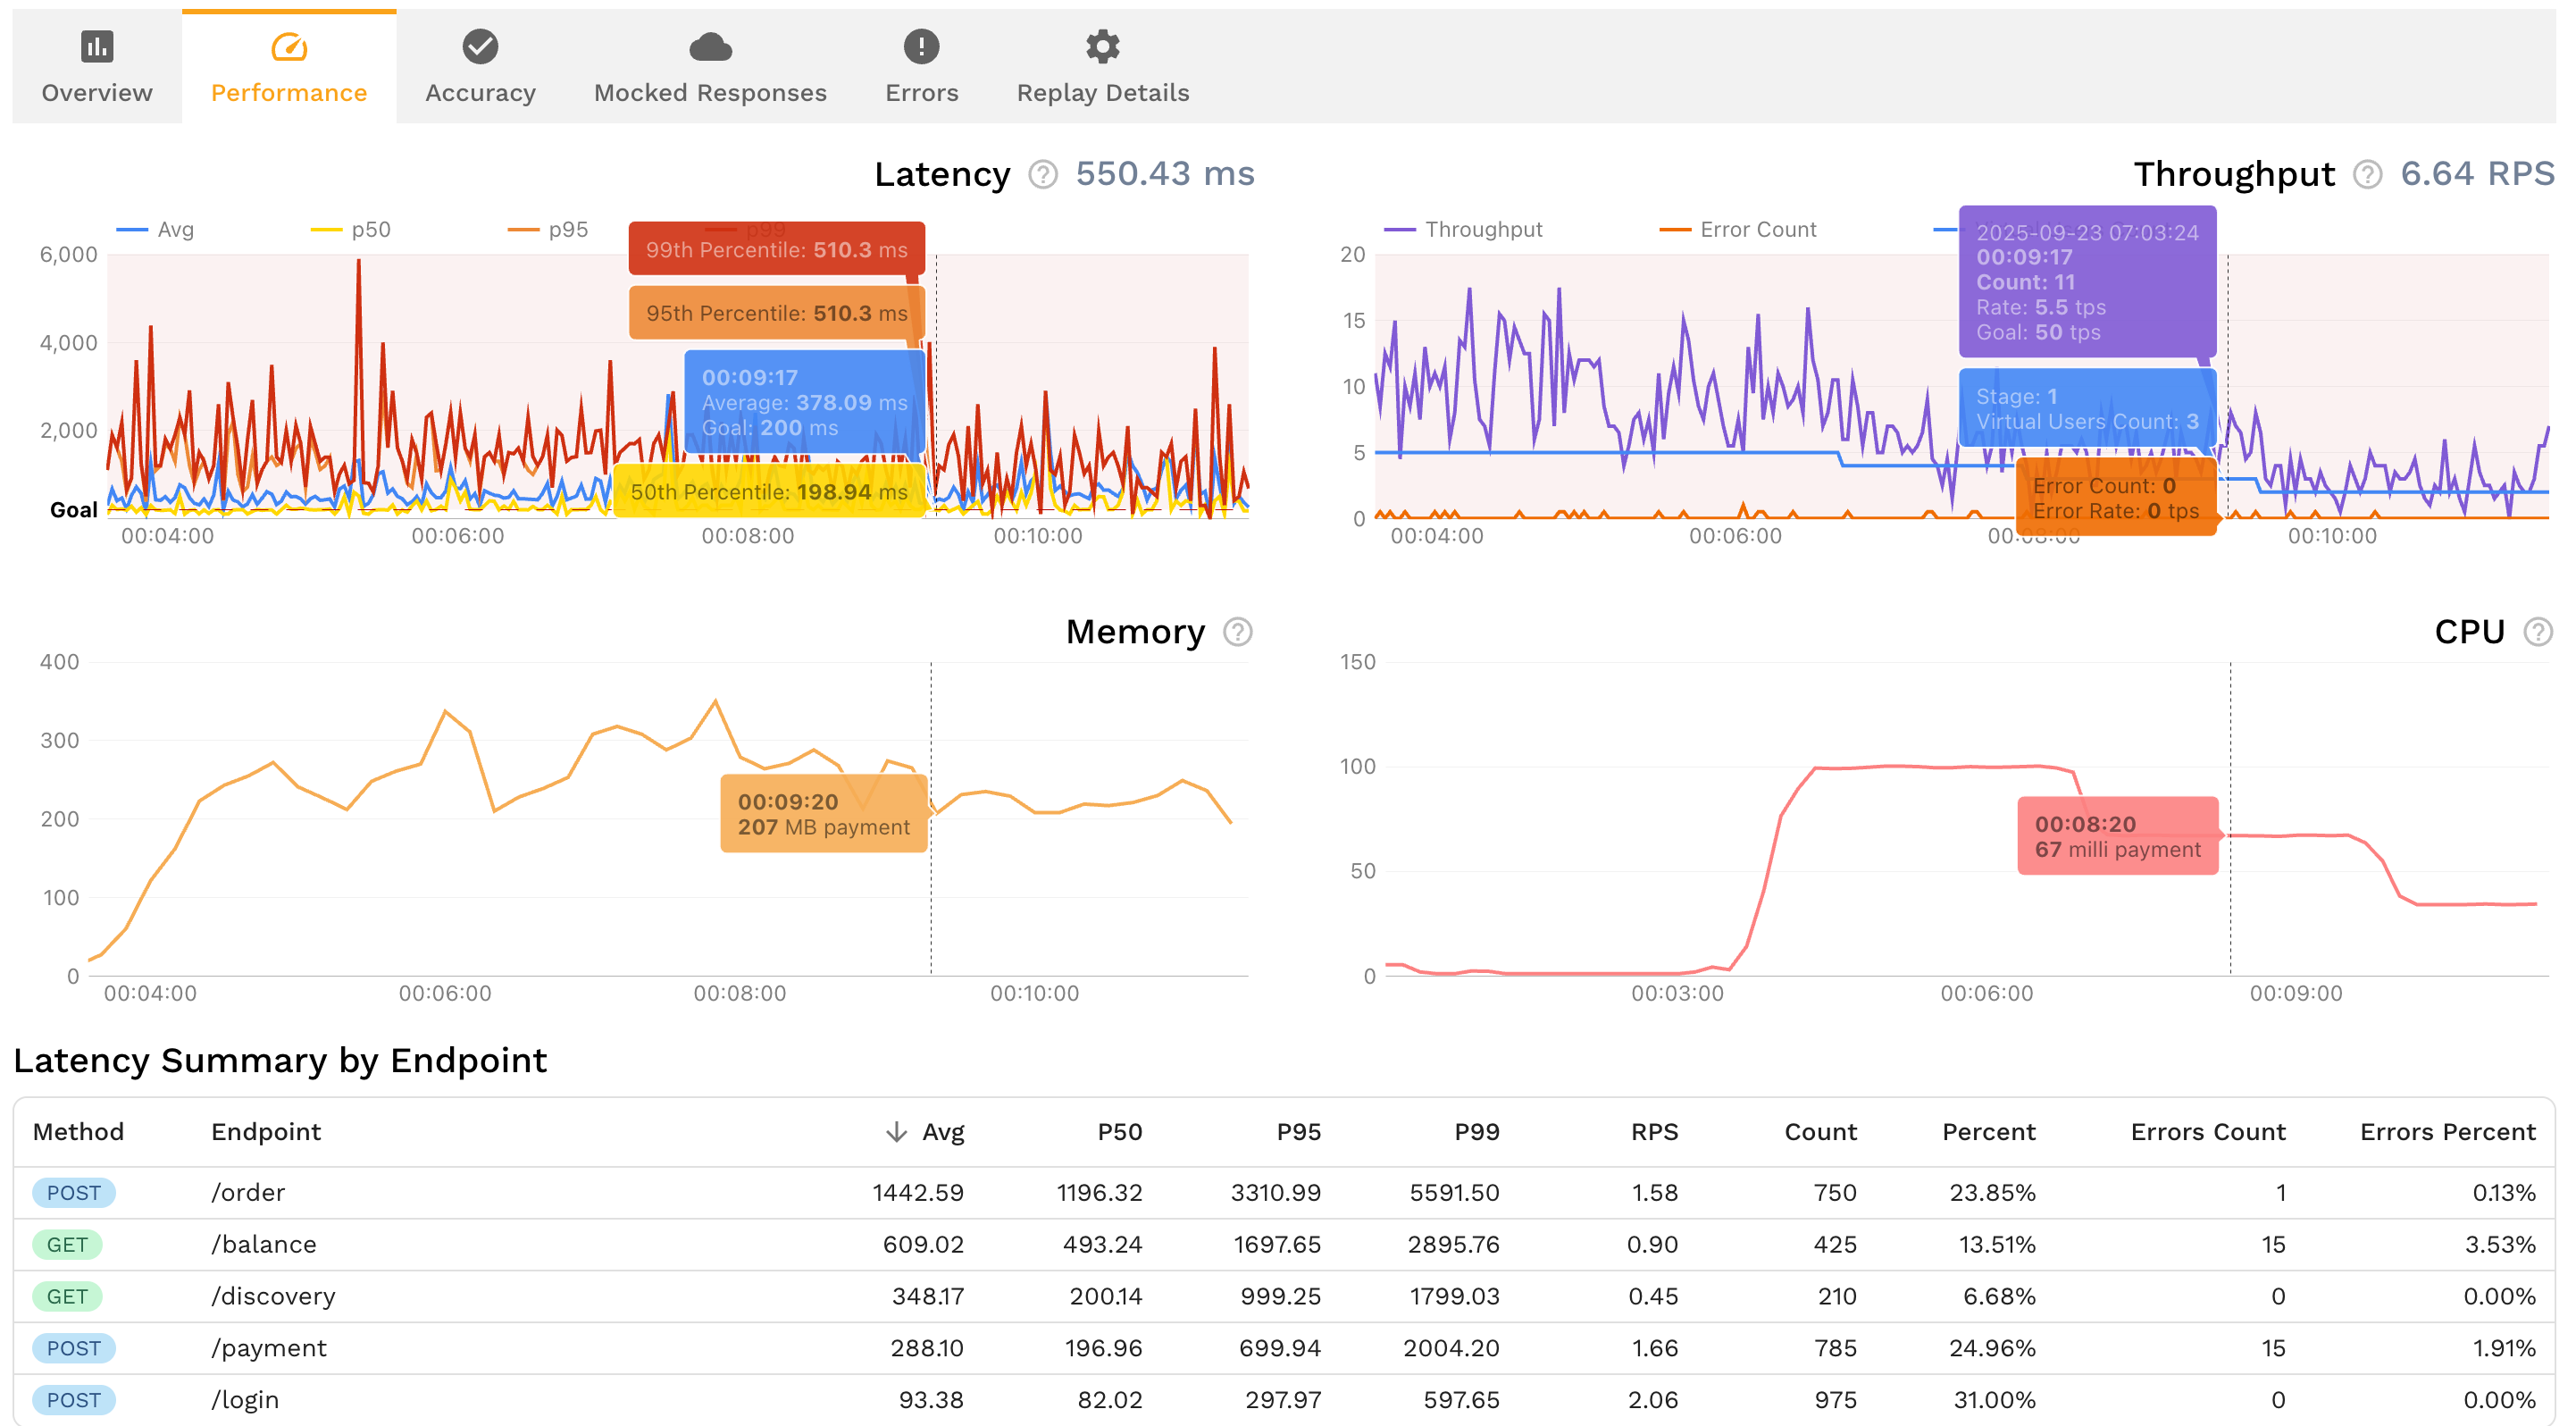
Compared to UI testing, API testing can often feel abstruse because it primarily focuses on the underlying code and is mainly performed at the integration level. Depending on your API’s purpose, it will likely be used by a diverse variety of developers, organizations, and systems—at least, that should be the goal. However, it can be difficult to simulate how your API will perform under every use case and real-world circumstance. A full-featured API testing solution should be able to help you address these challenges. It should help you test not just the functionality but the performance, security, and reliability of your API.
The following guide introduces you to two popular API testing tools: Speedscale and HyperTest. It will cover features, how easy each tool is to set up, cost, developer experience, and CI/CD integration.
Ease of Setup
Ease of setup refers to how quickly you can get the API integration testing tool up and running. You shouldn’t be spending more time learning how to use the tool than you are using it. That’s why the solution should be intuitive, feature clear instructions, and have responsive but simple sign-up and installation flows.
Setting Up Speedscale
To set up Speedscale for API testing, you’ll first need to sign up for an account. You can sign up using your Google account or email address (with a unique password).
Speedscale will then send a confirmation link to your inbox. Once you’ve successfully verified and logged in for the first time, you’ll be presented with a consent form and then rerouted to the dashboard (upon consent). By default, Speedscale will enter you into its thirty-day pro trial.
Speedscale will also email you a quick start guide. While it’s a good idea to read through it, it’s not absolutely necessary. The Speedscale dashboard’s Services section contains a list of services that correspond to the environment, testing methodology, or platform that you’re using to host or test your API.
Clicking the **Start** button under each service will reroute you to a web page containing installation instructions. In most cases, you’ll be required to install the Speedscale CLI (`speedctl`) and/or an operator.
> **Note:** Most operators can be installed and configured from the Speedscale CLI.
After you’ve installed and set up the Speedscale CLI, you’ll need to run the initialization command (`speedctl init`), which will require you to enter your API key. This can be found under your profile details.
You’ll then be able to run the `speedctl install` command, which will prompt you to choose your flow (Kubernetes, Docker, traditional server, or other—at the time of this guide’s writing).
Regardless of which method you choose, Speedscale will walk you through it. Once you’re done setting up your service, you can manage it from the dashboard and CLI.
Setting Up HyperTest
HyperTest is a no-code testing automation tool. It’s designed to integrate seamlessly into your codebase, expediting the creation of unit tests for a wide range of service interfaces. Setting up and signing up for an official HyperTest account requires a little bit of effort. There are two versions of the HyperTest documentation: the original and version 2. Regardless of which guide you follow, HyperTest requires you to use Linux (or a Linux VM) and Docker to deploy a self-hosted server. A working knowledge of Linux Bash is also recommended, as you may run into some errors or unclear instructions in the documentation. For instance, part of the command to start HyperTest upon reboot is inexplicably redacted in the CRON job creation section. If this hasn’t been fixed by the time you read this article, simply add `@restart` to the beginning of the command:
These issues aren’t necessarily a deal-breaker and are somewhat understandable, as HyperTest is transitioning to new versions of its application and documentation at the time of writing. Nevertheless, it can still take some work to set up and deploy a HyperTest server on your machine.
As an alternative, you can use an implementation of the server (dashboard) hosted by HyperTest. You first have to request a demo, which requires you to enter your name, work email address, company name, and phone number. Once your details are submitted, you’ll need to wait for their service engineer to contact you. This process seems a bit counterintuitive, but it may be a way for HyperTest to vet applications, distinguishing real interested subscribers from uncommitted “chance-takers.”
While you wait for a HyperTest solution engineer to contact you, you can take a live product tour, which requires no sign-up. Upon loading the product tour, you’ll be taken to HyperTest’s dashboard, which is loaded with sample data. Trying to find your bearings can be overwhelming at first, but HyperTest features a troubleshooting section that links you to relevant documentation from its help guide. You can also make using the dashboard easier by referring to the Dashboard Tour guide as you use it.
At the time of writing, HyperTest is transitioning to a new version of its dashboard. Consequently, some features are only accessible from the old dashboard:
This makes it a little more difficult to familiarize yourself with HyperTest’s workflow since you have to switch between the two dashboards. Nevertheless, this should be fixed in due time.
Developer Experience
Developer experience refers to the features and functions the API integration testing tool has to offer. It also covers how easy the tool is to use. Ease of setup is one thing, but the developer experience will help you ascertain which API integration testing tool is worth committing to.
Speedscale API Testing: Developer Experience
Speedscale is built on an API-first development principle. This means that every capability available in the UI can be accessed programmatically. Data collection and replays can be initiated using `speedctl`. This means that you can create your own scripts or even build a custom UI on top of Speedscale’s gRPC API. You can then export and display your data in a JSON (or JSON-like) format.
Alternatively, you can just stick to Speedscale’s dashboard, which provides you with the above functions in a ready-made UI. The most challenging part of using Speedscale for API testing is setting up your test configurations.
Most API testers will likely be interested in how Speedscale handles traffic. Inbound and outbound API traffic is captured and handled via a proxy sidecar. You can create tests and mocks and transform traffic to test not just the functionality of your API but also its performance. You can then use filters to create snapshots of anomalies or important traffic events.
Finding your way around Speedscale’s user interface and learning about its features doesn’t take very long. The dashboard’s interface is well-organized and segmented. It doesn’t present or throw walls of overwhelming information and data at you. Speedscale nurtures the software development experience in two main ways: with a wide range of testing options and with features that are as accessible as possible. In addition to its documentation, interested users have access to its playground, allowing them to see and work with live test demo data.
HyperTest API Testing: Developer Experience
HyperTest is a no-code test solution. Where Speedscale has two implementation methods, HyperTest has one. This isn’t necessarily a bad thing; it’s easier to troubleshoot, get support, and find solutions if there is a single path to doing things. HyperTest’s dashboard is well-organized and structured. The Home screen provides an overview of all your API traffic and integration tests. It features a collection of widgets that contain graphs and other visual information representing the various statuses and statistics of your tests and services. You’ll want to pay attention to the troubleshooting section, as it helps you address any issues with your integration tests and traffic.
HTTP calls and requests to and from your API can be viewed in the APIs section of the dashboard. This can be useful for HTTP/2 monitoring and testing. You can sort, filter, and aggregate your HTTP methods.
While HyperTest is a no-code tool on the surface, much of its configuration will require some coding. For instance, the service configuration is written in YAML, so you’ll need to have some understanding of it to add or alter the configuration.
Nevertheless, if you hope to effectively use HyperTest, you must familiarize yourself with the Settings menu. With Speedscale, you may find that the only reason you need to visit the Settings section is to retrieve your API key. Many of HyperTest’s advanced functions are tucked away here. This includes the middleware (analogous to Speedscale’s sidecar) that sits between your API(s) and HyperTest.
CI/CD Integration
If you already have a CI/CD development cycle in place or plan to establish one in the near future, you may be interested in how easy it is to plug these API testing solutions into it. Your candidate API testing solution should actively facilitate CI/CD integration. It should not force you to figure out your own integration strategy. Additionally, the integration testing tool should offer comprehensive test automation features.
Integrating Speedscale into CI/CD
There are multiple ways to integrate Speedscale into your CI/CD pipeline. In fact, this is one of the advantages of its API-first approach. You can integrate Speedscale into your CI/CD workflow your own way. You can create `speedctl` command-based scripts, and all commands can be viewed by running `speedctl help` in your terminal:
While it may be intuitive enough for an experienced orchestration, DevOps, or CI/CD engineer to figure out how to integrate Speedscale into their environments, it may not be as simple for inexperienced users. Fortunately, Speedscale features documentation that shows users how to integrate it with a plethora of popular providers, such as Jenkins, GitHub, and Azure DevOps.
Integrating HyperTest into CI/CD
Integrating HyperTest into your CI/CD pipeline or workflow is another aspect that cannot be done without some coding. Additionally, it will require you to run commands from your Linux machine’s shell. Fortunately, HyperTest features a comprehensive step-by-step guide and video to help you with CI integration.
HyperTest can be integrated with providers such as Bitbucket, GitLab, GitHub Actions, and Jenkins. You can find configuration sample files in the aforementioned integration guide. HyperTest’s CI/CD implementation is slightly more limited than Speedscale’s. The CLI can only run from a Linux shell, and it doesn’t have as many options or features as `speedctl`.
Documentation and Support
While a good API testing solution should be intuitive enough for you to set up and use without outside help, this can’t always be the case. Due to your infrastructure or team setup, you may have unique requirements that you can’t address on your own. The API test service/solution should have well-structured and well-written documentation that’s easy to navigate. The service should also offer multiple channels to reach its team for aid and support.
Documentation and Support for Speedscale API Testing
The only time you’re ever required to contact Speedscale during initial setup is to verify your email account. Of course, this is done automatically. Speedscale will then routinely send you helpful resources and newsletters.
The amount or level of support you receive depends on your plan. “Startup” offers community support, “Pro” offers business day support, and “Enterprise” offers dedicated Slack support. You can learn more about the differences between these plans by visiting Speedscale’s pricing guide.
Speedscale’s community (and much of its support) is managed through Slack. Thus, your experience may hinge on how much you like or dislike Slack. Nevertheless, this has the benefit of near-instant feedback when you run into a wall and need help. You’re not stuck wondering when a service agent or representative will respond to you via email.
Most blockades can be addressed using one of Speedscale’s official guides. In fact, much of Speedscale’s documentation, features, and user interfaces seem organized to encourage independence and self-service. The documentation is well-written and concise, and many of the guides are accompanied by videos. Most instructions also feature annotated images with the relevant links and controls highlighted or circled, making them easier to follow.
Documentation and Support for HyperTest API Testing
As highlighted in the “Ease of Setup” section, the HyperTest quick start guide could benefit from some polish and refinement. The company keeps essential information, such as pricing, walled off from the public. This means you have to submit your contact details before you’re allowed to test-drive the integration testing tool on your own terms with your own data.
While you wait for a response, you can refer to HyperTest’s knowledge base. At the time of writing, some of the content is slightly outdated, and there are some dead links and videos that are no longer available:
However, HyperTest’s documentation is powered by GitBook, which some consider the industry standard for modern software development documentation. The interface is responsive, and much of the documentation is concisely written and easy to follow (especially HyperTest’s v2 documentation).
Conclusion
There are a wide range of API testing tools on the market. It’s always best to first understand what API testing methodologies you hope to follow before making a final decision on which API testing solution you’ll use. Both HyperTest and Speedscale support production traffic replication, which essentially covers all testing methodologies. However, their approaches are slightly different. Whereas HyperTest autogenerates integration tests by analyzing network traffic, Speedscale allows you to do the same but with more control. You can set custom snapshots, copy them, and transform your traffic. Your Speedscale integration tests are encapsulated and organized by service, infrastructure, and traffic, making it easier for you to manage and maintain your API tests.
While Speedscale may beat HyperTest in departments such as support, ease of setup, and overall software development experience, it should be noted that HyperTest is in a transitional period. Many of its issues stem from how it has chosen to deliver the solution and not the solution itself. If set and run correctly, it can be used as a formidable no-code API testing tool. It just takes a lot of effort—for now. On the other hand, Speedscale feels like a more complete product. It grants you enough freedom to dictate how your APIs should be tested and when (or where) testing should be orchestrated by your CI/CD pipeline.