Local Kubernetes Environments: Part 2
If you missed it, check out our original overview of Local Kubernetes Development environments here.
Kubernetes shouldn’t be reserved for production. Using local Kubernetes in development means you can build and test your service using the same technologies as your live deployments.
Some organizations provide a shared Kubernetes cluster for development activities. Others offer on-demand virtual clusters that serve staging environments for significant changes. A major drawback with these approaches is the increased iteration time they incur—developers can get stuck waiting for clusters to start or changes to roll out over the network.
In this article, you’ll look at five tools for running a desktop local Kubernetes cluster on your development machine. Hosting a cluster on your own hardware strikes a balance between quick iteration and maintaining parity with production environments. Although each of the tools gives you a standards-compliant Kubernetes distribution, they achieve it in different ways. The projects in this article have been selected because they’re popular with developers, include a strong selection of supporting features, and are easy to set up and maintain.
minikube - easy local kubernetes
minikube is one of the leading desktop Kubernetes distributions. It’s maintained as part of the Kubernetes project and aims to provide a fully featured cluster experience for developers.
minikube works on Windows, macOS, and Linux. It relies on either a virtual machine environment or Docker containers to run your cluster. Several virtualization drivers are available, including KVM2, QEMU, Hyper-V, VirtualBox, VMware, and Parallels.
Install one of the platforms listed before deploying minikube. You can then download the correct package for your system from minikube’s repository, as seen in this example for Debian Linux:
$ curl -LO https://storage.googleapis.com/minikube/releases/latest/minikube_latest_amd64.deb
$ sudo dpkg -i minikube_latest_amd64.deb
Once minikube is installed, you can start your cluster in one command. Run minikube start to deploy your new local Kubernetes environment. minikube will automatically detect your virtualization and containerization platforms and configure itself accordingly:
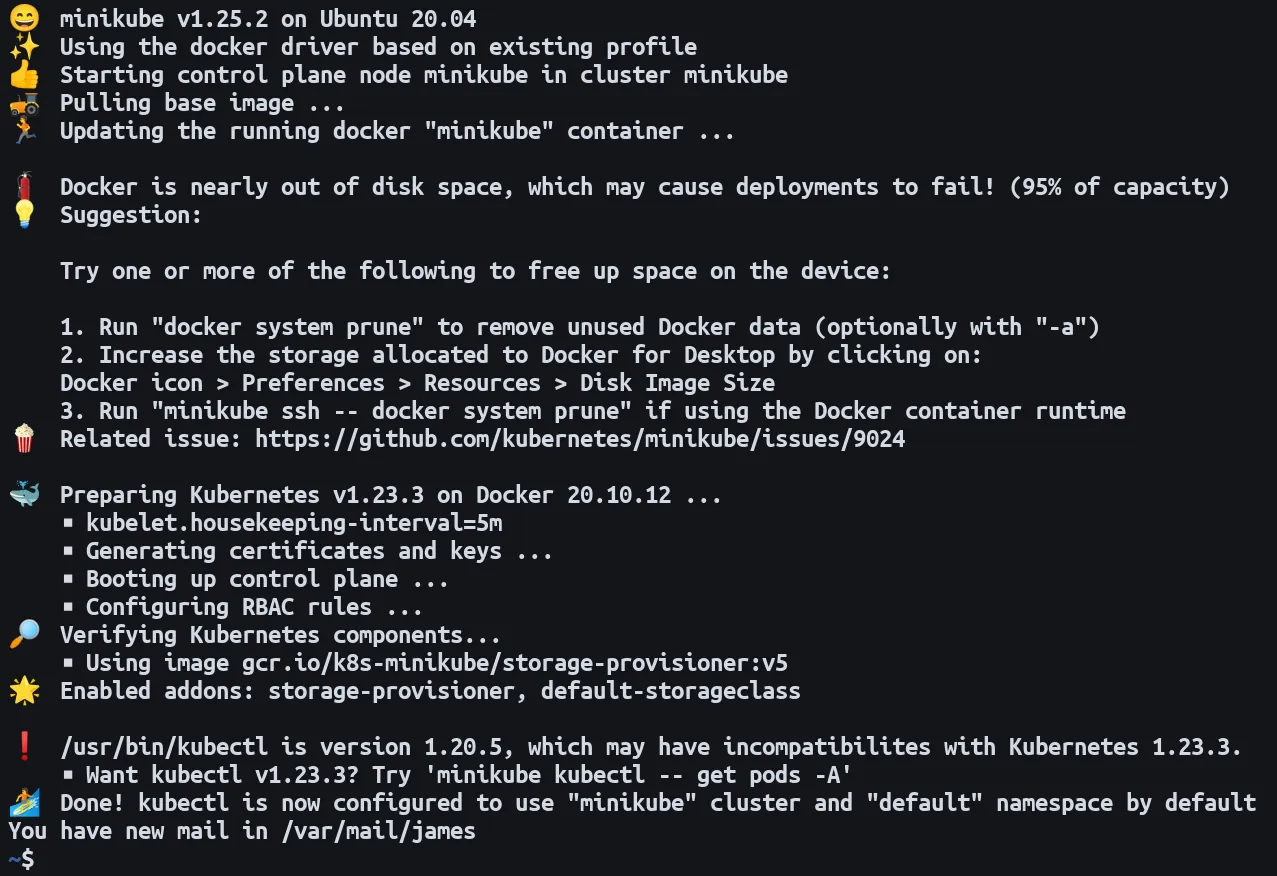
After your cluster’s started, you can interact with it using your existing kubectl installation. Alternatively, run minikube kubectl to use the binary that’s bundled with minikube:
$ minikube kubectl get pods
No resources found in default namespace.
minikube also has a built-in add-on that provides access to the Kubernetes web dashboard. Run the following command to enable the dashboard and open it in your default browser:
$ minikube dashboard
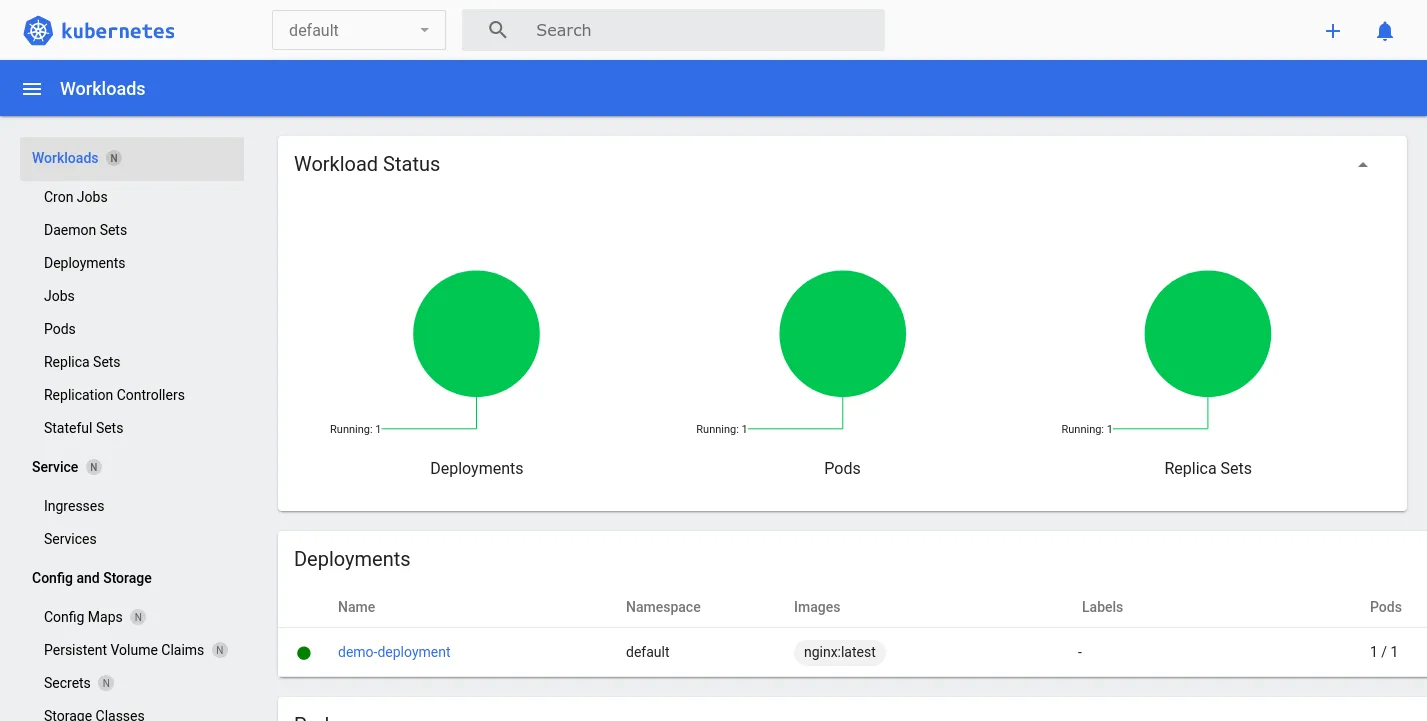
The dashboard offers a visual overview of the resources in your cluster. It can make it easier and more convenient to perform management activities.
kind - bare bones local kubernetes
kind is another distribution that’s maintained within the Kubernetes project. kind, sometimes stylized as Kind or KIND, is an acronym that stands for Kubernetes in Docker. Unlike minikube, kind exclusively uses Docker containers to host Kubernetes components and your application deployments. You must install Docker before you can use kind.
kind publishes prebuilt binaries on its GitHub Releases page. Download the correct binary for your system, make it executable, and move it into a location that’s in your path:
$ curl -Lo ./kind https://kind.sigs.k8s.io/dl/v0.14.0/kind-linux-amd64
$ chmod +x ./kind
$ mv ./kind /usr/local/bin/kind
Now you can use the kind command to create your first local Kubernetes cluster:
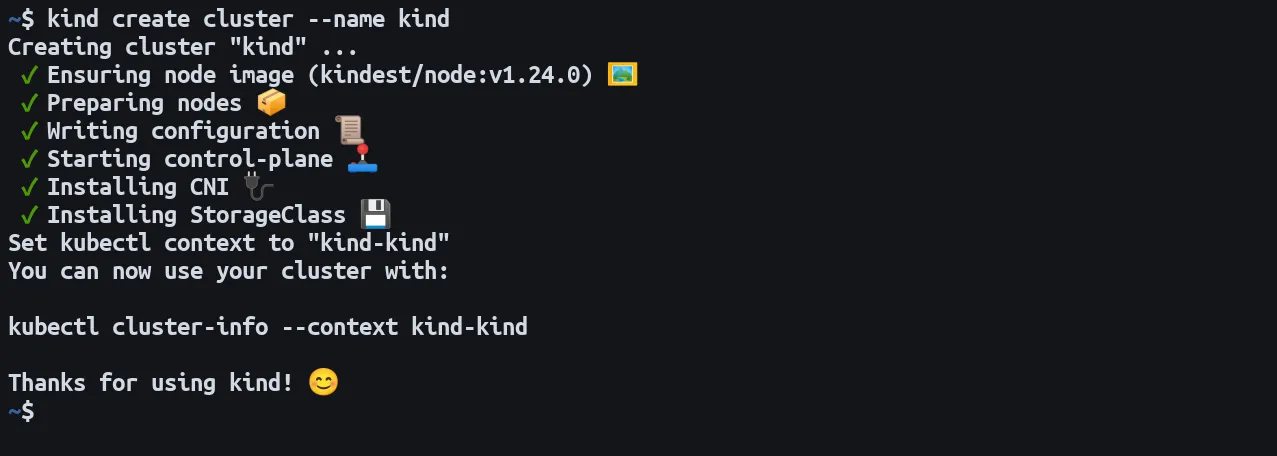
$ kind create cluster --name kindThis will start new Docker containers to run the local Kubernetes control plane components. The --name flag means kind will create a kubectl context called kind that provides access to your cluster. This is the default name when the flag is omitted. Here’s what the process looks like:
kind is a more bare-bones experience than minikube. kind doesn’t come with kubectl, so you have to manually install it before you can interact with your cluster:
$ curl -LO "https://dl.k8s.io/release/$(curl -L -s https://dl.k8s.io/release/stable.txt)/bin/linux/amd64/kubectl"
$ sudo install -o root -g root -m 0755 kubectl /usr/local/bin/kubectl
Now you can use kubectl to interact with your cluster by selecting the provided context. kind prepends all context names with kind-, so the correct name for the example above is kind-kind:
$ kubectl config use-context kind-kind
Switched to context "kind-kind".
$ kubectl get pods
No resources found in default namespace.
kind was originally built as a way of developing Kubernetes itself. It can seem less approachable than the other options on this list. Nonetheless, kind’s simple focus makes it a good choice in situations where you’re already running Docker, as long as you’re comfortable with hands-on Kubernetes management using stand-alone tools.
K3s - Rancher-backed local kubernetes
K3s was created by Rancher but is now under the umbrella of the Cloud Native Computing Foundation (CNCF). K3s is designed to fulfill the role of a lightweight Kubernetes distribution that can run in resource-constrained environments.
One of the focus areas for K3s is IoT devices and high availability on the edge. It ships a single self-contained binary file that weighs in at under 50 MB. The binary bundles everything needed to run your cluster, including the containerd container runtime. There’s also integrated support for load balancing, storage management, and ingress routes. Its rounded capabilities make it an ideal contender for desktop Kubernetes clusters.
K3s supports AMD64, ARM64, ARMv7, and S390X architectures but only runs natively on Linux. Rancher Desktop is a cross-platform alternative which offers an integrated graphical management dashboard. Rancher Desktop is a heavier option as it uses virtualization to package a K3s cluster.
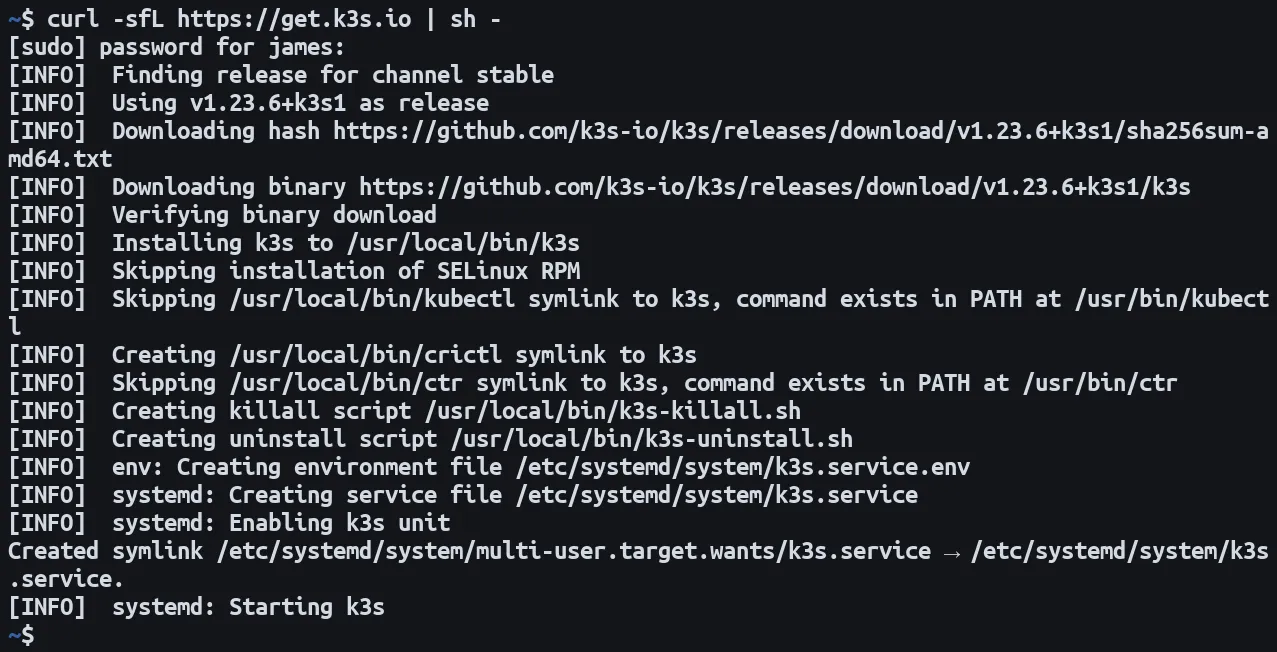
The recommended way to install K3s is to run the installation script provided on the project’s website. This takes care of downloading the latest binary release, moving it into your path, and registering a systemd or openrc service so K3s starts automatically after reboots:
$ curl -sFL https://get.k3s.io | sh -The first-run setup process can take up to a minute to complete:
Once K3s has started, you can use the included kubectl command to begin interacting with your cluster:
$ k3s kubectl get pods
No resources found in default namespace.
K3s also deposits a kubeconfig file into its installation directory. You can use a stand-alone kubectl installation and external tools, like Helm, by referencing this file with the KUBECONFIG environment variable:
$ KUBECONFIG=/etc/rancher/k3s/k3s.yaml kubectl get podsThe single-binary nature of K3s means it’s easy to install and maintain. It’s exceptionally lightweight while including everything that’s expected of a production-ready Kubernetes implementation, including high-availability support and integrated ingress support via Traefik. However, K3s is relatively opinionated and less specifically developer-oriented than minikube. Hence, it can require more configuration to produce the cluster environment you need.
MicroK8s - lightweight local kubernetes
MicroK8s is a Kubernetes distribution from Canonical, the developer of Ubuntu Linux. It provides a complete local Kubernetes experience from a single package, similar to K3s.
MicroK8s is available on macOS via Homebrew (brew install ubuntu/microk8s/microk8s) and on Windows as a graphical installer wizard. On Linux, MicroK8s is distributed using the Snap package format. Snap support has been included with Ubuntu releases since 2018 and is available for all other popular distributions. You can install the MicroK8s snap with the following command:
$ sudo snap install microk8s --classicThe --classic flag relaxes the snap security restrictions so MicroK8s gains the level of system access it requires:

Next, add your user account to the microk8s group. This ensures you can run microk8s commands without prefixing them with sudo each time:
$ sudo usermod -a -G microk8s $USERReboot your system to apply the change.
MicroK8s bundles kubectl in its package. Use the following command to start interacting with your new Kubernetes cluster:
$ microk8s kubectl get pods
No resources found in default namespace.
MicroK8s has fully integrated Kubernetes dashboard support that’s activated similarly to minikube. The dashboard is an optional add-on that’s enabled with a single command:
$ microk8s enable dashboard
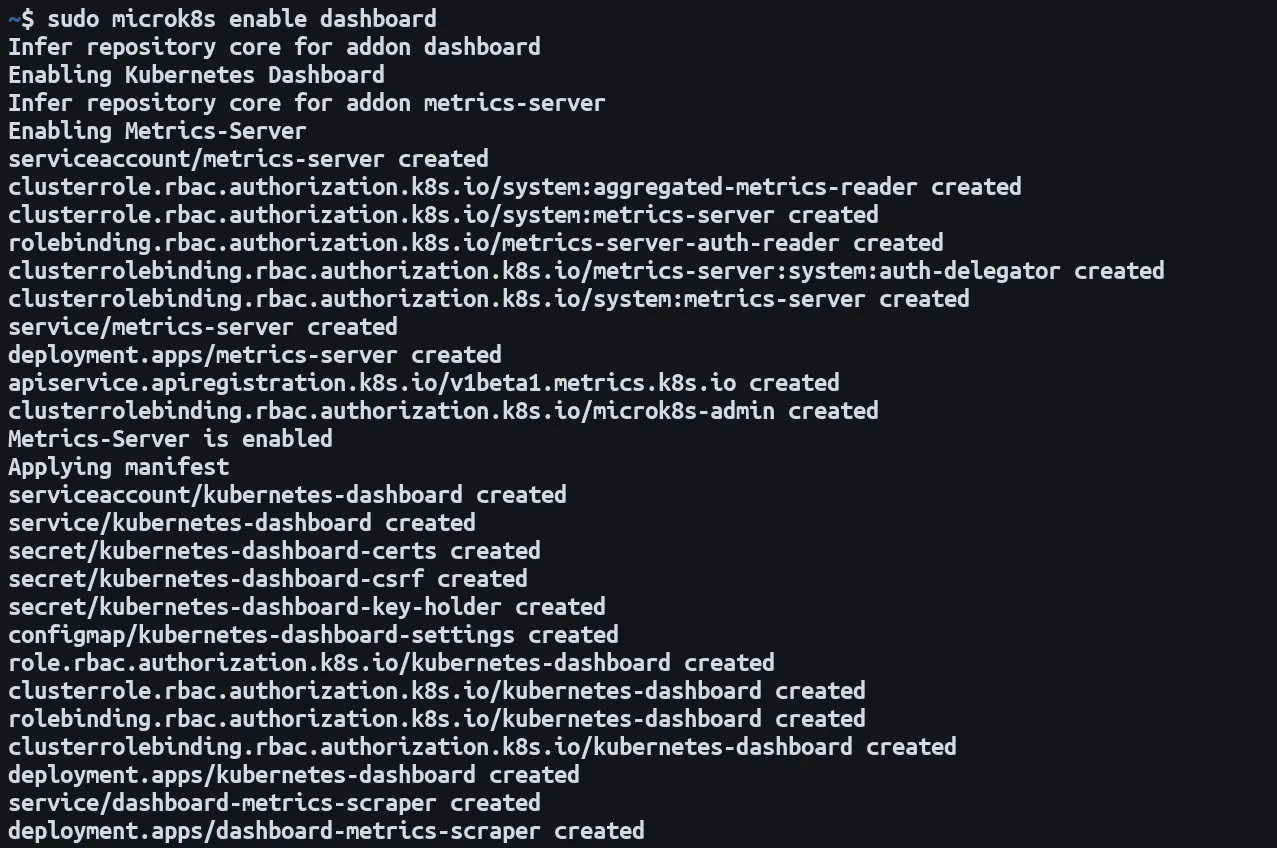
Next, run the dashboard-proxy command to start a secure proxy tunnel to your cluster and launch the dashboard in your browser:
$ microk8s dashboard-proxy
MicroK8s has become one of the most popular desktop Kubernetes solutions. It is easy to install and is supported by a wide range of integrated add-ons for common functions. The Kubernetes dashboard, NVIDIA GPUs, ingress support, and a built-in container image registry are all a single command away. It’s directly aimed at developers and can be less resource intensive than a virtualized minikube cluster.
Docker Desktop
You may not need the other tools above if you’re already using Docker Desktop. This is one of the most popular ways to build images and run containers on Windows and macOS. It now works on Linux, too, so you can install one tool to manage all your containerization tasks (including Kubernetes) across your device fleet.
Docker Desktop downloads are available for all three platforms from the Docker website. A graphical installer wizard is provided for macOS and Windows; Linux users can opt for packages built for Debian, Fedora, and Arch-based distributions.
After installing Docker Desktop, click the settings icon in the top-right of the user interface. Then select Kubernetes in the left sidebar and tick the Enable Kubernetes checkbox on the page that appears. Press the Apply & Restart button to complete the process:
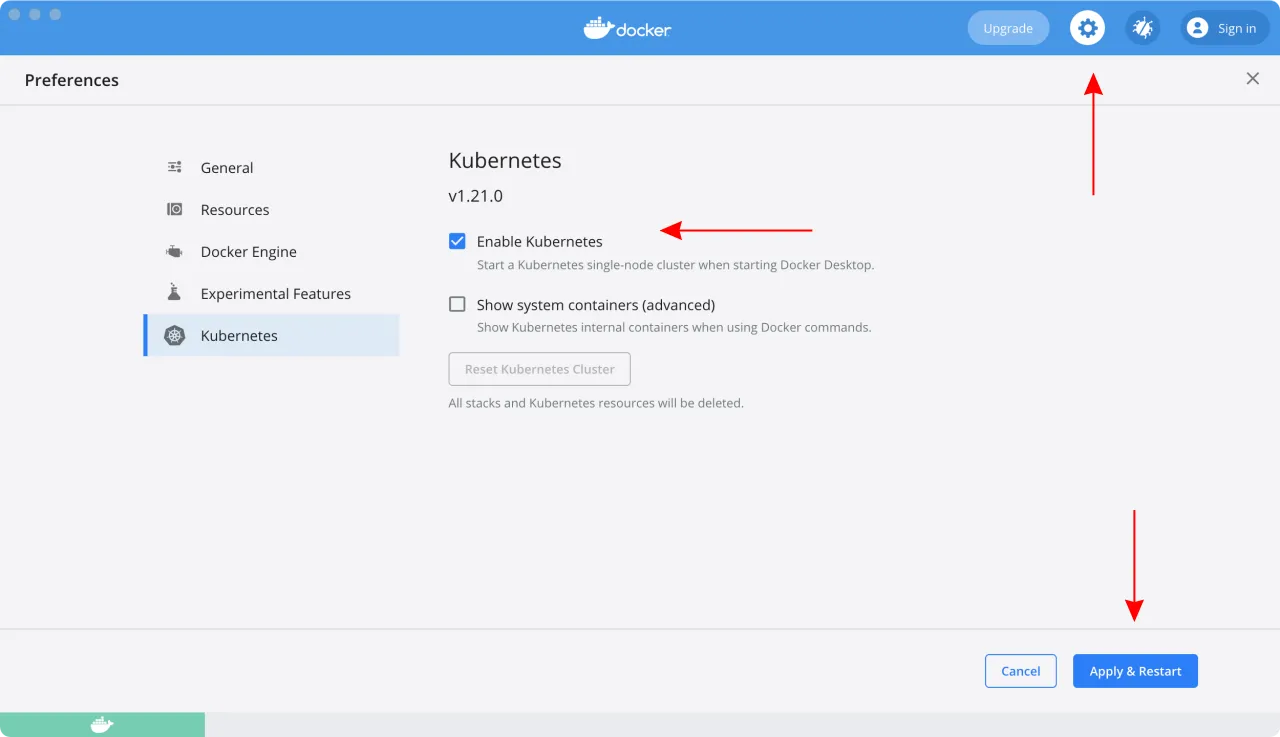
It may take a few minutes for Docker Desktop to restart and provision your Kubernetes control plane. It will create new Docker containers that will host the Kubernetes API server and act as nodes for your workloads. You shouldn’t delete these containers as they’re managed by Docker Desktop for you. They won’t show up when you run commands like docker ps. You can make them appear if you need to by enabling the Show system containers option on Docker Desktop’s Kubernetes settings page.
Docker Desktop provides its own kubectl command like most of the other tools on this list. So kubectl will be available in your path after activating the Kubernetes feature:
$ kubectl get pods
No resources found in default namespace.
You can also use stand-alone tools to target Docker Desktop’s Kubernetes implementation. A kubeconfig configuration context called docker-desktop is created automatically; selecting this in kubectl will run commands against your local cluster:
$ kubectl config use-context docker-desktop
Switched to context "docker-desktop".
Docker Desktop’s Kubernetes solution will often be the most convenient because many developers already use the platform to build and run containers. Compared to the other tools above, Kubernetes in Docker Desktop is less customizable, though, which means you’re restricted to a single Kubernetes release and there’s no integrated add-on system.
Conclusion
Running Kubernetes locally on your desktop lets you efficiently develop containerized services using the same deployment routines as production. As you’ve seen above, there’s no shortage of distributions that focus on offering a streamlined desktop development experience.
Once you’ve started your Kubernetes cluster, a good next step is to set up test automation to accelerate your everyday workflows. Speedscale can automatically set up and tear down test environments in clusters created with any of the tools listed above. It can simulate varying loads, stress your scaling rules, and perform chaos testing to find issues before your users do. Successful tests should give you confidence that your deployments are fit for purpose.