When running tests in a CI/CD pipeline, relying on external APIs can introduce instability, slow down execution, and even lead to failed builds due to rate limits or API downtime. Fortunately proxymock provides a solution by capturing API interactions and running a local mock server, enabling fully isolated and repeatable tests.
In this blog, we’ll demonstrate how to integrate proxymock into a GitHub Actions CI pipeline using a demo app called outerspace-go. This app makes calls to the Numbers API and SpaceX API, and we’ll show how proxymock can capture these calls and replay them locally during automated tests.
You can watch the video version of this tutorial:
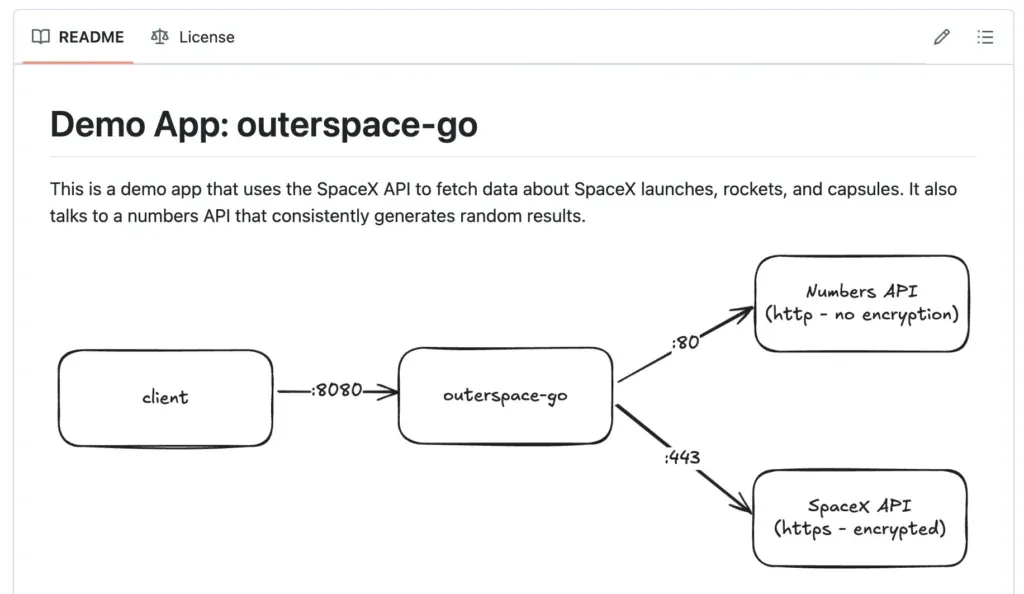
Overview of the outerspace-go App
outerspace-go is a Go-based application that fetches data from external APIs:
- The Numbers API provides fun facts about numbers.
- The SpaceX API delivers the latest SpaceX launch data.
By default, running the app will query these APIs directly, but we will configure proxymock to capture and replay these requests for testing purposes.
Why Use proxymock in CI Pipelines?
When running tests in CI/CD, external API dependencies can be problematic:
- Unreliable availability: The API might be down or rate-limited.
- Slow performance: API calls introduce latency into test runs.
- Inconsistent data: Live APIs may return different responses over time.
Using proxymock in CI allows us to:
- Capture real API responses once and replay them consistently.
- Run tests quickly without waiting for network requests.
- Ensure our tests are independent of external services.
Setting Up proxymock Locally
To start using proxymock, install it and record API calls:
Installation
For your MacOS environment it’s as simple as using brew.
brew install speedscale/tap/proxymockOr download it manually.
Initialize
If this is the first time you’re running you can initialize from your command line:
proxymock init
                         _               _
 ___ _ __   ___  ___  __| |___  ___ __ _| | ___
/ __| '_ \ / _ \/ _ \/ _` / __|/ __/ _` | |/ _ \
\__ \ |_) |  __/  __/ (_| \__ \ (_| (_| | |  __/
|___/ .__/ \___|\___|\__,_|___/\___\__,_|_|\___|
    |_|
Welcome to Speedscale! Preparing your installation...
Choose one:
 [1] Need to sign up
 [2] Have an API key
 [3] Have an account but no API key
 [q] Quit
▸ How do you want to initialize the cli? [q]: 1
▸ Enter your email to sign up:
Recording API Calls
-
Start
proxymockin record mode, and make a note of the ID for the snapshot recording that is created.proxymock record -
Run the outerspace-go application while proxymock captures the outgoing API requests:
export http_proxy=http://localhost:4140 export https_proxy=http://localhost:4140 go run main.go -
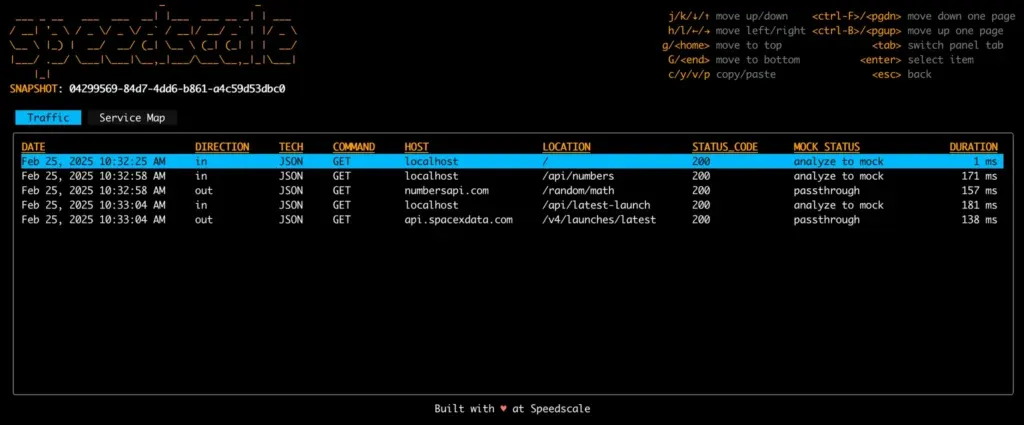
Now run some test transactions against the application and you’ll see some traffic recorded:
curl http://localhost:4143/ curl http://localhost:4143/api/numbers curl http://localhost:4143/api/latest-launch -
Once you’re done hit CTRL-C on your
proxymockwindow to save your data locally. Now you can open the data in your terminal with this commandproxymock inspect
Replaying API Calls:
To use the recorded API responses instead of making live calls:
proxymock run --dir ./proxymock SNAPSHOT_ID
```go
This starts a mock server that returns the recorded responses whenever the app makes requests.

For your go code to talk to the mock server, simply add these environment variables, note that this will configure a forward proxy to the `proxymock` running locally and listening on port 4140.
```bash
export http_proxy=http://localhost:4140
export https_proxy=http://localhost:4140
Now when you invoke your code, it will make downstream calls to the mock APIs, providing consistent, repeatable responses.
Integrating proxymock into GitHub Actions
To use proxymock in GitHub Actions, we:
- Install
proxymockin the pipeline. - Use the recorded mocks to serve API responses.
- Run tests against the mock server.
Example GitHub Actions Workflow:
name: CI Pipeline
on: [push, pull_request]
jobs:
test-and-build-go:
runs-on: ubuntu-latest
permissions:
contents: read
steps:
- name: YOUR_STEPS_GO_HERE
- name: Setup proxymock
env:
PROXYMOCK_API_KEY: ${{ secrets.PROXYMOCK_API_KEY }}
run: make proxymock-setup
- name: Run proxymock
run: make proxymock-run
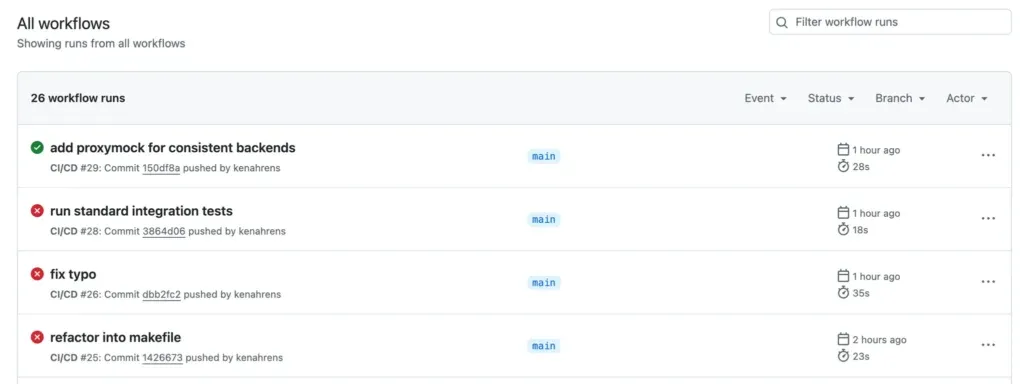
- name: Run tests with proxymock
run: make test-with-proxymockYou can see the full details in the GitHub Actions overview:
Conclusion
Using proxymock in your CI pipeline ensures that your tests remain stable, fast, and independent of external API availability. By capturing and replaying API interactions, you can create reliable and repeatable test environments that eliminate downtime risks and performance bottlenecks.
By integrating proxymock into your GitHub Actions workflow, you gain:
- Faster test execution by avoiding network latency.
- More reliable builds that aren’t affected by third-party API failures.
- Easier debugging with recorded API interactions.
Try it out with the outerspace-go demo and explore how proxymock can enhance your CI/CD workflow!