tcpdump.
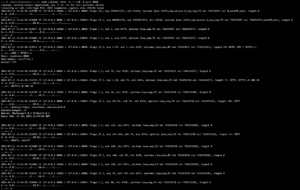
If you are unfamiliar, tcpdump is a tool that allows you to dump and inspect live network traffic being observed on a network interface. It supports a wide array of options including both filtering using BPF (Berkley Packet Filter) expressions and the ability to create packet capture (pcap) files. For example, we can watch an HTTP request occur to a local test server, like a curl -v but on steroids:
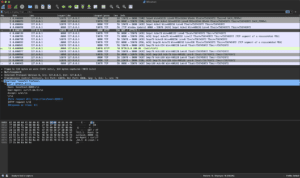
 This live traffic view of network packets is certainly useful, but I much prefer to use
 tcpdump to create pcap files and then inspect them more closely in wireshark:
 This works great if you are dealing with your local machine, a physical server, or a plain cloud compute instance like an EC2. However, the Kubernetes ecosystem throws a few wrenches into this approach:
- Your containers need to be built with
tcpdumpavailable - You need to modify your container’s entrypoint to support running both your program and
tcpdump(if you want continuous capture) - You need to exec a shell in the container to run
tcpdump(if you want on-demand capture) - You need to modify your container definition to run with elevated permissions – something you may not want to do for security reasons
tcpdump. To do this, we can use github/google/gopacket, an extremely useful packet parsing library, which contains utilities for reading and writing pcap files, as well as for capturing packets directly from a network interface.
There are few requirements to consider when using this approach:
- The packet capture utilities utilize
libpcapC calls, so your application must not disable cgo when being built - Your build environment must have
libpcapand headers (usuallylibpcap-dev) installed
eth0, as well as create and initialize our destination pcap file:
					package example

import (
    "context"
    "os"
    "time"

    "github.com/google/gopacket"
    "github.com/google/gopacket/layers"
    "github.com/google/gopacket/pcap"
    "github.com/google/gopacket/pcapgo"
)

func RunPacketCapture(ctx context.Context) {
    sourceHandle, err := pcap.OpenLive("eth0", 1600, true, pcap.BlockForever)
    if err != nil {
        log.Fatal("Failed to create packet capture handle")
        return
    }
    defer sourceHandle.Close()

    // capture only tcp traffic
    if err := sourceHandle.SetBPFFilter("tcp"); err != nil {
        log.Fatal("Failed to set BPF filter")
        return
    }

    // destination path you want your pcap saved to
    outputFilename := "/tmp/myapp-capture.pcap"
    outputFile, err := os.Create(outputFilename)
    if err != nil {
        log.Errorw("Failed to craete packet capture output file", "err", err, "filename", outputFilename)
        return
    }
    defer func(outputFile *os.File) {
        if err := outputFile.Close(); err != nil {
            log.Errorw("Failed to close file", log.FErr, err)
        }
    }(outputFile)

    outputWriter := pcapgo.NewWriter(outputFile)
    if err := outputWriter.WriteFileHeader(1600, layers.LinkTypeEthernet); err != nil {
        log.Errorw("Failed to write file header", log.FErr, err)
        return
    }
}
 packetSource := gopacket.NewPacketSource(sourceHandle, sourceHandle.LinkType())
    packetChan := packetSource.Packets()

    for {
        select {
        case <-ctx.Done():
            log.Println("Packet capture context cancelled, exiting")
            return
        case p := <-packetChan:
            err = outputWriter.WritePacket(p.Metadata().CaptureInfo, p.Data())
            if err != nil {
                log.Fatal("Failed to write packet data")
            }
        }
    }
					package main

import (
    "context"
)

func main() {
    ctx, cancel := context.WithCancel()
    defer cancel()

    go RunPacketCapture(ctx)

    // the rest of your main() function
}
					spec:
  template:
    spec:
      containers:
        name: your-app
        securityContext:
          allowPrivilegeEscalation: true
          capabilities:
            add:
            - NET_RAW
            - NET_ADMIN
          privileged: false
          readOnlyRootFilesystem: false
          runAsNonRoot: false
setcap as part of your ENTRYPOINT:
ENTRYPOINT setcap cap_net_raw,cap_net_admin+eip /path/to/your/program && /path/to/your/program
kubectl:
kubectl cp -n your-namespace -c your-container-name your-pod-name:/tmp/myapp-capture.pcap myapp-capture.pcap
The above approach gives a raw look at all of a pod’s underlying network traffic. It has helped us discover API connectivity issues that we would not have been able to observe otherwise. In fact, it was an unexpected TCP RST packet from the API (but that is a topic for another post)!
Alternatively, instead of doing all of this yourself, Speedscale can perform it automatically! Integration testing APIs can be complex. Code changes can introduce latency or outages, but testing everything with end-to-end environments is slow. With Speedscale, easily change the shape of the traffic replay with config files. Multiply traffic for load testing, validate field by field for integration testing, or introduce latency and non-responsiveness for chaos. No scripting required. Use Speedscale to replay past traffic and get updates out the door with confidence.
To learn more, visit the Speedscale product page or schedule a demo to review product capabilities with our team.
-Shaun Duncan, Founding Engineer at Speedscale